MySQL Installation and Basic Usage
Note: This article was translated from Chinese to English by Claude AI (Anthropic).
MySQL Installation and Usage
Installation
MySQL Community Server
MySQL Community Server is the database server responsible for actually storing and managing data.
Download link: https://dev.mysql.com/downloads/mysql/
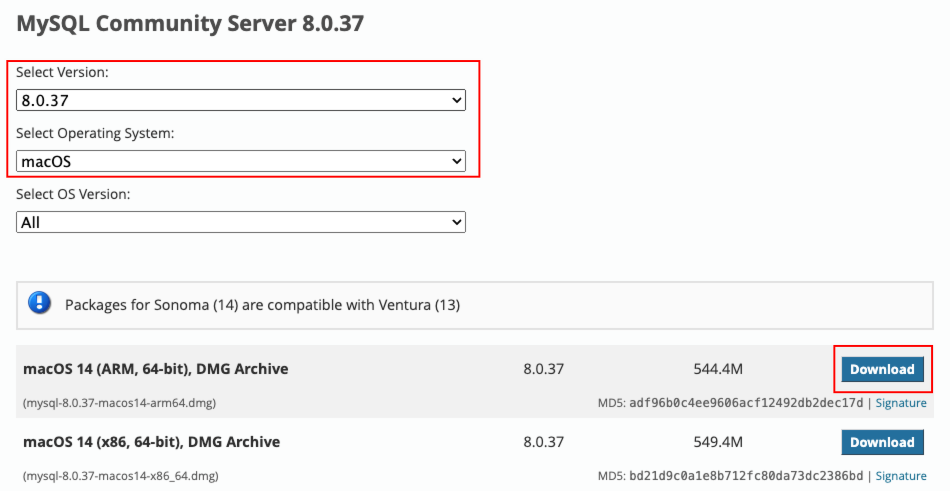
Select your version and operating system, then click the Download button. I’m using macOS 14 with an M1 chip, so I selected macOS 14 (ARM, 64-bit), DMG Archive for download.

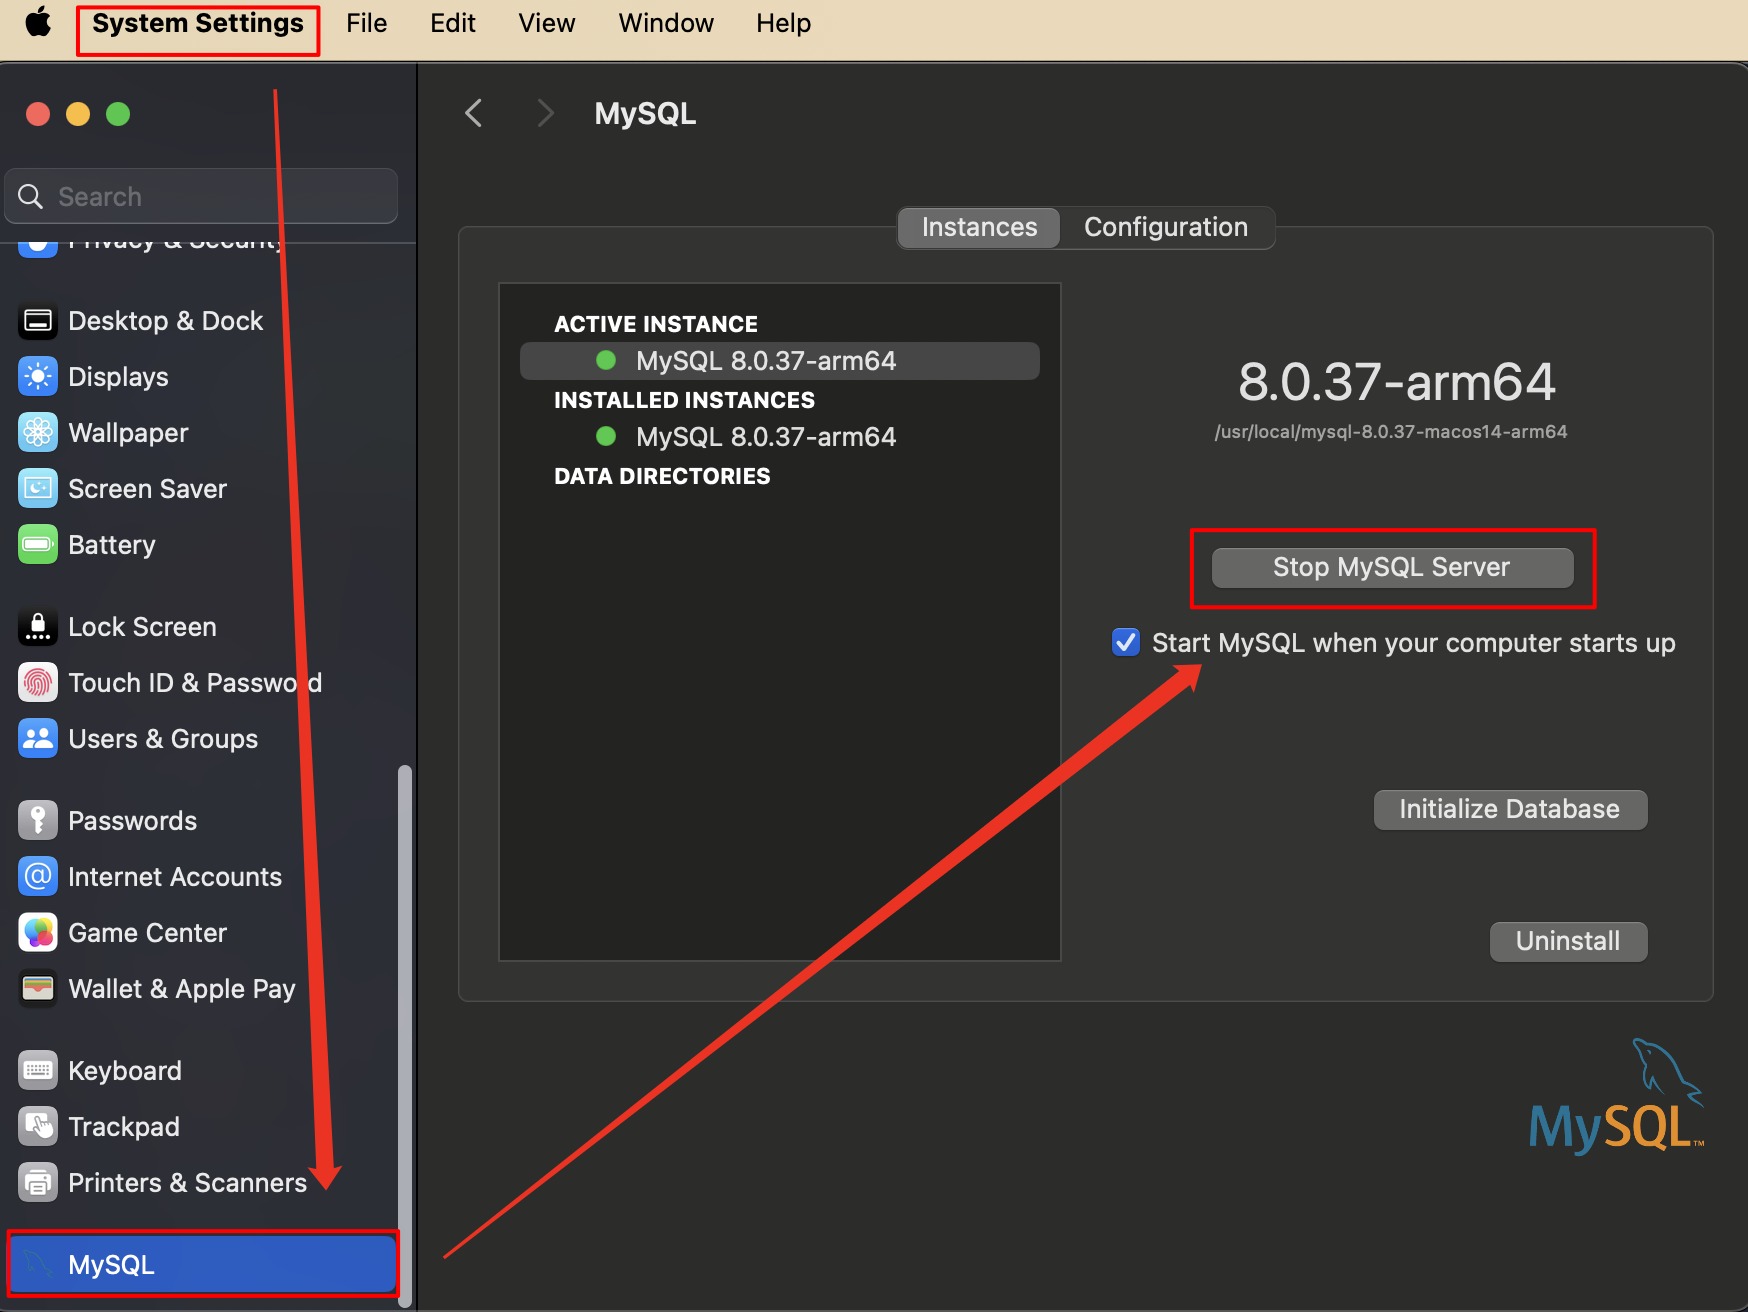
After installation, open System Settings, scroll to the bottom to find MySQL, and click the button to run the MySQL service.

MySQL Workbench
MySQL Workbench is a client application that you can use to connect to MySQL Community Server for database design, development, and management operations.
Make sure to keep versions consistent. Download link: https://dev.mysql.com/downloads/workbench/
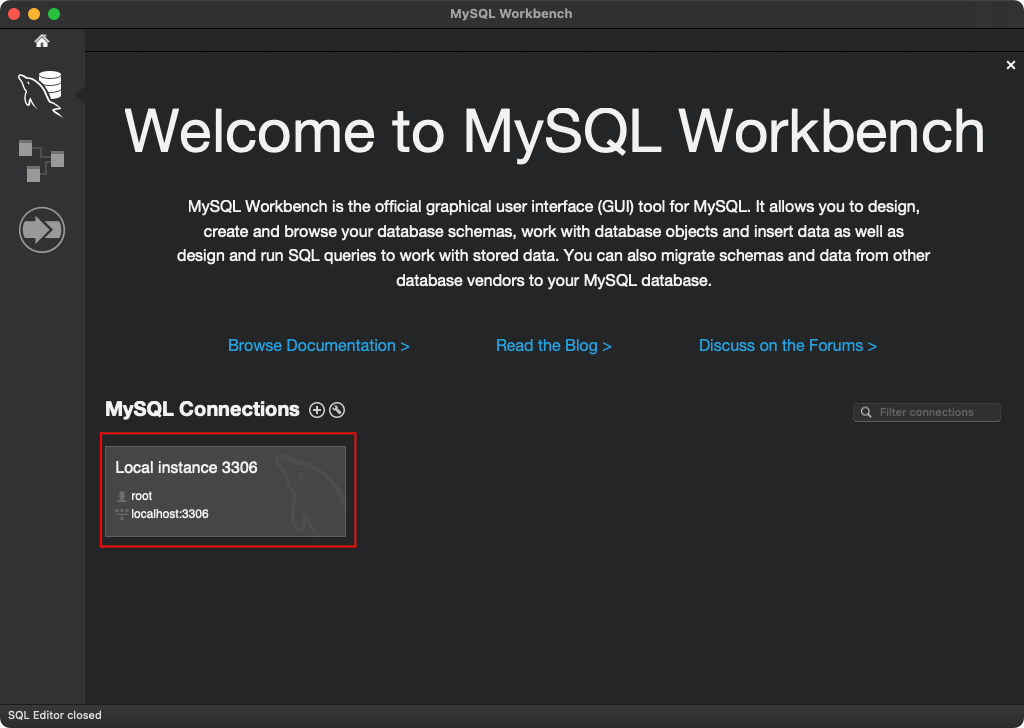
After installation, open it, click on Connection or create a new one, enter the password and you’re good to go.

Environment Variables
Check current shell
echo $SHELLIf it shows /bin/bash, you’re using bash; if it shows /bin/zsh, you’re using zsh.
For bash:
# 1. Edit
vim ~/.bash_profile

# 2. Add
export PATH=${PATH}:/usr/local/mysql/bin

# 3. Update
source ~/.bash_profile
For zsh:
# 1. Edit
vim ~/.zshrc

# 2. Add
export PATH=${PATH}:/usr/local/mysql/bin

# 3. Update
source ~/.zshrc
Enter MySQL CLI
mysql -u root -pEnter the installation password to successfully enter MySQL CLI.
Command Line Tools
For all command line options, check the official documentation: mysql Client Commands
Here are some common ones:
\g and \G are both command terminators; alternatively, you can use ; to end commands.
\g # Send command to MySQL server
\G # Send command to MySQL server and format output
\c # Clear current input
\q # Exit MySQLBasic Usage
Connect to MySQL
mysql -u root -p
Enter password:******
Basic Commands
Show Database List
SHOW DATABASES;Create Database
CREATE DATABASE testdb;Use Database
USE testdb;Create Table
CREATE TABLE users (
    id INT AUTO_INCREMENT PRIMARY KEY,
    name VARCHAR(100),
    email VARCHAR(100)
);
View Table Structure
DESCRIBE users;Data Operations
Insert Data
INSERT INTO users (name, email) VALUES ('John Doe', '[email protected]');Query Data
SELECT * FROM users;Update Data
UPDATE users SET email = '[email protected]' WHERE name = 'John Doe';Delete Data
DELETE FROM users WHERE name = 'John Doe';Common Features
Conditional Queries
SELECT * FROM users WHERE email LIKE '%@example.com';Sorted Queries
SELECT * FROM users ORDER BY name ASC;Aggregate Functions
SELECT COUNT(*) FROM users;
SELECT AVG(id) FROM users;
Multi-table Operations
Create Second Table
CREATE TABLE orders (
    order_id INT AUTO_INCREMENT PRIMARY KEY,
    user_id INT,
    product_name VARCHAR(100),
    FOREIGN KEY (user_id) REFERENCES users(id)
);
Join Queries
SELECT users.name, orders.product_name
FROM users
JOIN orders ON users.id = orders.user_id;
The SELECT users.name, orders.product_name clause specifies the columns we want to extract from the database:
- The name column from users table (users.name)
- The product_name column from orders table (orders.product.name)
The
FROM usersclause specifies our first query table, the users table. TheJOIN orders ON users.id = orders.user_idclause joins the two tables. It uses an inner join to associate the users table with the orders table. The join condition is users.id = orders.user_id.
INNER JOIN returns all records from both tables that meet the condition. If a record has matching records in both users and orders tables, it will be included in the result set. In simple terms, this query returns all users who have orders and their order product names.
For example, given these two tables:
users table:
| id | name |
|---|---|
| 1 | Alice |
| 2 | Bob |
| 3 | Charlie |
orders table:
| order_id | user_id | product_name |
|---|---|---|
| 101 | 1 | Laptop |
| 102 | 1 | SmartPhone |
| 103 | 2 | Tablet |
The query result will be:
| name | product_name |
|---|---|
| Alice | Laptop |
| Alice | Smartphone |
| Bob | Tablet |
Common Issues
No Apply Button When Creating Table in MySQL Workbench
Version 8.0.36 has issues, replacing with 8.0.34 resolves this.
ERROR 1819 (HY000): Your Password Does Not Satisfy the Current Policy Requirements
Running the following code will give an error:
ALTER USER 'root'@'localhost' IDENTIFIED WITH mysql_native_password BY 'admin'Error message: ERROR 1819 (HY000): Your password does not satisfy the current policy requirements. The password doesn’t meet security requirements. Change the password security requirements to fix this. Steps to resolve:
Login to MySQL
mysql -u root -pCheck current password policy
SHOW VARIABLES LIKE 'validate_password%';+-------------------------------------------------+--------+
| Variable_name | Value |
+-------------------------------------------------+--------+
| validate_password.changed_characters_percentage | 0 |
| validate_password.check_user_name | ON |
| validate_password.dictionary_file | |
| validate_password.length | 8 |
| validate_password.mixed_case_count | 1 |
| validate_password.number_count | 1 |
| validate_password.policy | MEDIUM |
| validate_password.special_char_count | 1 |
+-------------------------------------------------+--------+Modify current password policy
SET GLOBAL validate_password.length=4;
SET GLOBAL validate_password.policy=LOW;
Now the password policy has been modified
+-------------------------------------------------+-------+
| Variable_name                                   | Value |
+-------------------------------------------------+-------+
| validate_password.changed_characters_percentage | 0     |
| validate_password.check_user_name               | ON    |
| validate_password.dictionary_file               |       |
| validate_password.length                        | 4     |
| validate_password.mixed_case_count              | 1     |
| validate_password.number_count                  | 1     |
| validate_password.policy                        | LOW   |
| validate_password.special_char_count            | 1     |
+-------------------------------------------------+-------+
Refresh privileges and try changing password again
FLUSH PRIVILEGES
ALTER USER 'root'@'localhost' IDENTIFIED WITH mysql_native_password BY 'admin';